I've been doing some research into mechanical keyboards recently and I've realised that re-built keyboards are not the only keyboards available. You can buy keyboard kits from companies that contain all the needed components for you to put together your dream keyboard.
Most of these kits involve the use of a soldering iron to solder the components to the circuit board (aka PCB). Since my soldering experience is minimal (at best) I decided that I would look for something cheap that I could have a go at before embarking on something more serious.
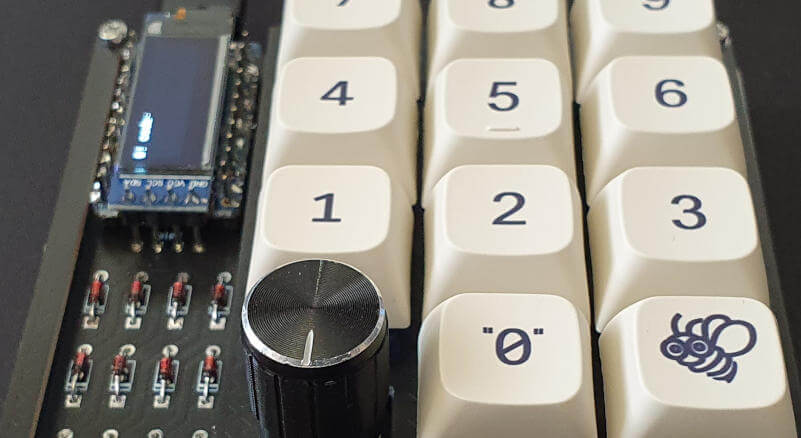
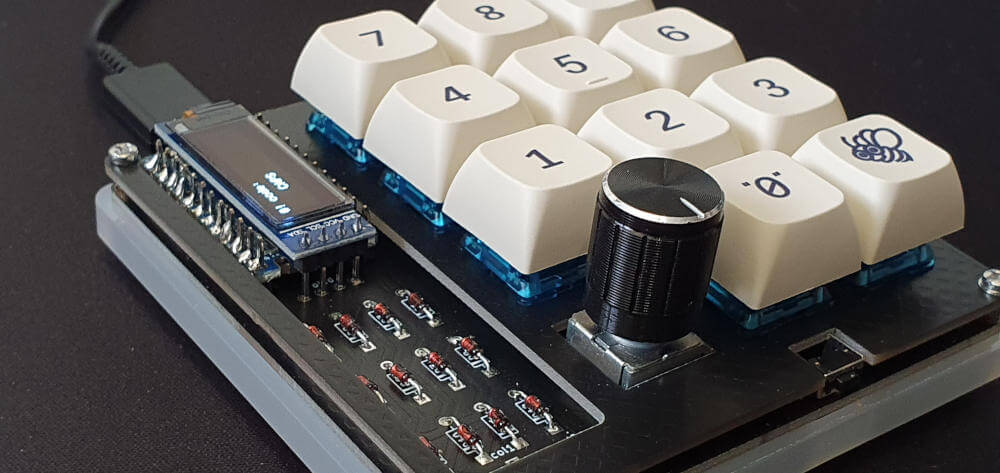
When I saw the small RoMac Plus Macropad kit from the amazing Mechaboards (who are based in the UK) I decided to buy this as it fits in with exactly what I wanted to go for. The keyboard is an 11 key keyboard with a rotary encoder and a small LED screen.
Perhaps more features than I should have gone for as a first time kit, but it would be a good addition to my desk setup if I did manage to get it working. This is also described as a 20% keyboard, since it is only 20% the size of a fully size keyboard. The PCB of the RoMac board is open source as well, which is a nice bonus.
Most of these custom keyboards use an open source keyboard firmware called QMK (Quantum Mechanical Keyboard). This means that once you've soldered together the keyboard you then need to flash it with the appropriate firmware in order to allow it to work correctly.
In this article I will look at how I built the RoMac Plus Macropad, how I setup the QMK firmware and some overall thoughts on the board. Most of these steps will also apply to any small scale keyboard project.
The Components
The macropad from Mechboards doesn't come with all the components needed to run the keyboard, and they make that clear on the site. You need the following to make the keyboard function as a complete project:
- A set of 11 switches and the corresponding keycaps.
- A controller. This is the "brains" of the keyboard and will manage the interface between the computer and the board components.
- The RoMac Plus Macropad kit. This contains the PCB and all of the components needed to get the board working (minus the controller).
I decided to go for a Elite Pi for this project (purchased at the same time through Mechboards). This is a Raspberry PI product that has a powerful microcontroller with a USB-C interface and has more than enough power for this little board.
For the switches, I went for some Gateron Ink Blue switches, which are the same as Gateron Blue switches, but are coloured transparent blue. These switches have a crisp and audible click when pressed and aren't the sort of thing you want in an office environment (they are pretty loud really).
Finally, the I added some XDA profile keycaps that I bought from Whatgeek. These keycaps are nice and clear and give a chunky look to the board. As the board is flat and ortholinear (meaning that the keys are in a grid, rather than staggered), having different profile keys causes the keys to oddly layered when added to the board. You don't need XDA profile keycaps here, as the board is perfectly usable with any Cherry MX compatible keycaps so any numberpad keys will work here.
The Soldering
I want to say first that I have very minimal soldering experience. I once repaired an Xbox 360 DVD drive by swapping the logic boards from one the bad drive to the good, but that was only 4 wires. This kit, on the other hand, is an entirely different skill level and although I deliberately chose a small project, it was quite a daunting experience to jump into.
I bought a chat soldering iron from ebay that I could control the temperature of as some of the components (namely the RGB LEDs underneath) would melt otherwise.
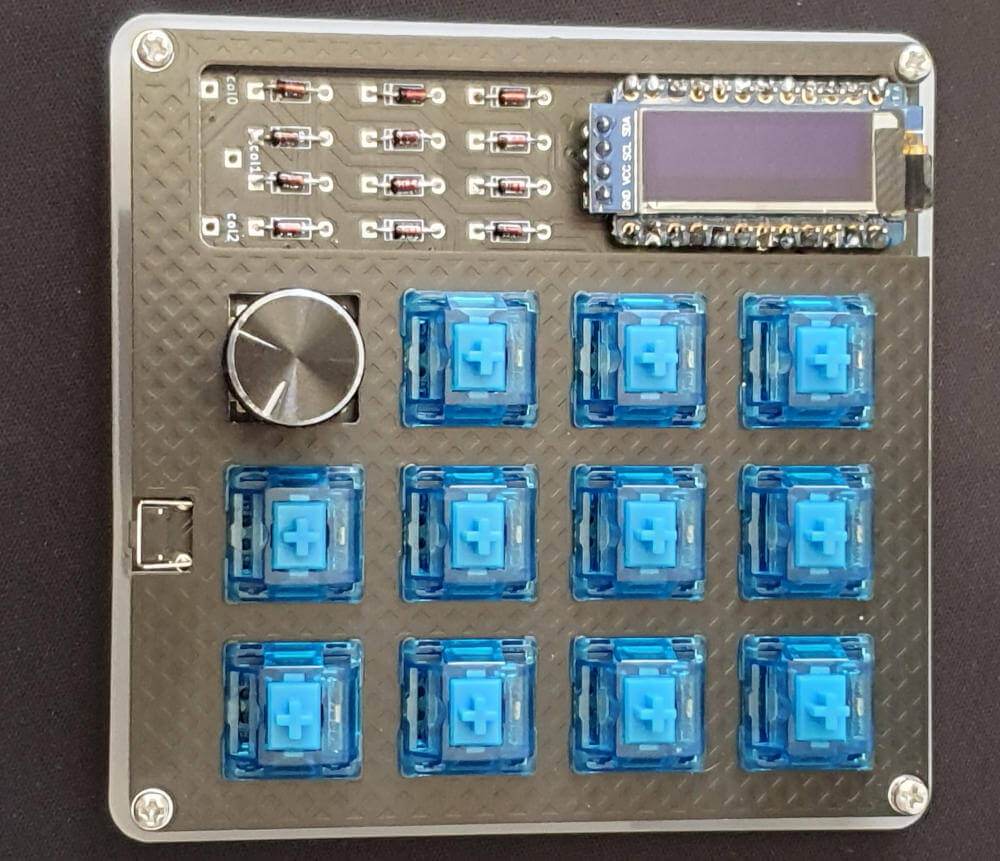
After watching a few tutorials about soldering on YouTube I got stuck in and began work. The instructions from Mechboards on how to put the kit together were really clear and helpful and I'm pleased to say that the end product wasn't a complete disaster. Some of the solder looks really messy, but overall it's a good first attempt at a project like this.
The next step is to flash the board with the QMK operating system.
As a quite note, it's often a good idea to flash the controller with QMK before you solder it to the board. This is because occasionally you can have a faulty board and finding this out after you solder it can be a pain. In my case, I just powered ahead and soldered everything right from the start. Thankfully the board was ok and everything worked.
Flashing With QMK
In order to use the board I needed to flash it with an operating system. As it turns out, this is the most difficult step in the whole process.
These instructions are based around using QMK on a Linux machine. Your mileage may vary for other operating systems.
First, you need to make sure you have the correct prerequisite packages of Git and Python3 PIP. Open a terminal and type the following.
sudo apt install -y git python3-pip
Using PIP you can now install QMK for your user.
python3 -m pip install --user qmk
If you haven't already you need to make your user's "~/.local/bin" directory available to the path. Add the following lines to your bash profile to get this working (with the username swapped to your username).
export PATH="/home/myusername/.local/bin:$PATH"
With all that in place you can then run the QMK setup program.
qmk setup
This will run install the QMK firmware to your computer at the directory "~/qmk_firmware/", the install script will also install a bunch of system dependencies for you as well. On my system this took about 10 minutes to complete.
Once that's done you should be able to run the "qmk" command in your terminal and see some some help text.
To see the keyboards available you can run the "qmk list-keyboards" command, and in this massive list of keyboards you should see the romac_plus keyboard. The source code for the keyboard will be kept in "~/qmk_firmware/keyboards/kingly_keys/romac_plus", which we can now use flash to the keyboard.
As I had decided on the Elite Pi I needed to do some version of the keyboard files for them to work correctly. This means that when flashing I had to use the CONVERT_TO parameter, with the text "elite_pi".
Here is the command that will flash the firmware to the keyboard.
qmk flash -c -kb kingly_keys/romac_plus -km default -e CONVERT_TO=elite_pi
Once that's done you should see the text "Let's build something together!" written on your OLED screen. All of the keys will now perform actions well with the number keys printing numbers and the rotary encoder controlling the volume. By pressing in the rotary controller you can also access a second level of keys, which gives you access to the page up and page down keys under the 6 and 9 keys.
If you want to re-flash the board then you run the same command again, but this time you need to press the little "reset" switch at the front of the board. I have found that the best way to do this is by double tapping the button.
One thing I did notice was that the rotary encoder, although worked, was reversed with the code available in the QMK library. Turning it to the left turned the volume up, and turning to the right turned the volume down.
After looking through the source code for a bit I figured out what the issue was. It looks as though pins A and B are swapped, meaning that they are sending opposite instructions to the computer. This is defined in the "info.json" file in the "kingly_keys/romac_plus" directory in the QMK repo.
  "encoder": {
    "rotary": [
      {"pin_a": "B3", "pin_b": "B2"}
    ]
  },
To fix this, I edited the file and swapped the values.
  "encoder": {
    "rotary": [
      {"pin_a": "B2", "pin_b": "B3"}
    ]
  },
After re-flashing the board the rotary encoder is now swapped. Turning the dial to the left turns the volume down, and visa-versa.
I also quickly found out how to alter the text on the LED screen, which I then changed to something more on brand.
The QMK Firmware package on Github is the repository we downloaded here, with the RoMac plus firmware being available inside the keyboards section of the repository. This directory contains the following files:
- config.h - Used to configure some global options for the board.
- info.json - Provides a matrix of the keys available on the board as well as information about other pins and accessories that the board might have.
- rules.mk - A configuration for the QMK build system. This allows options to be changed that control how the QMK firmware is compiled.
- keymaps/default/keymap.c - This is where the keys of the board are mapped to the matrix from the info.json file. This is the file you'll want to change if you want to add custom macros and change the output on the LED screen.
- keymaps/via/keymap.c and keymaps.via/rules.mk - These files are used to allow the keyboard to be configured through the Via application.
Alternatively, you can opt to use the QMK Configurator to configure your keyboard, but this limits you to the functionality provided by the configuration tool. You also need to flash the downloaded firmware to your device. I prefer to write some code as it allows for full control over the board and allows for macros and other features to be added easily.
Conclusion
This was a fun project to do and it only cost me around £30 for the kit and all of the components. It's a good price if you want to have a go at soldering something that will actually be useful.
The typing experience provided by the Gateron Blue switches and the chunky keycaps don't really count here as I only ever press one or two keys at a time. It does feel satisfying to press a key though.
Once I got my head around QMK I found it easy to start altering things that the board can do. I haven't written much C code in my career as a web developer, but once I got into the syntax it was then just a case of looking at the QMK documentation to get the pad to do what I wanted. It only took me a few minutes to get the keyboard to print out "https://www.hashbangcode.com/" using a simple button press. I'm working on getting things like emojis and more complex things like flipping tables (╯°□°)╯︵ ┻━┻.
There's lots to learn around the QMK system, and I feel like I'm just scratching the surface of a wider world of configurable keyboard options. I wouldn't say that I have had an easy time of this, but what I have altered makes sense and was pretty simple to achieve.
The addition of the case from Mechboards is a good touch as well (although it's just a couple of bottom plates), it really helps to finish the project off. I was kind of hoping for a case that would protect the components a little more, and perhaps hiding my dodgy soldering skills, but it does a good job of presenting the board and it looks good on my desk. The board also comes with some LEDs to give the board some colour, thankfully these are entirely optional as I did mess these up when attempting to install them. I did, however, order some replacements from the Mechboards site so I'll have another go at that soon.
When researching this board I found that the RoMac board now unsupported. The person who created everything seems to have disappeared, but at least the GitHub pages they put together are all still working. Thankfully, the board itself works in a pretty generic way and so it's easy to modify the QMK firmware to do what you need.
I would recommend looking at the Mechboards shop for kits like this, as well as other mechanical keyboard accessories. They have a wide range of products, including keyboard components, special group buys and even a good selection of full keyboards. If you don't fancy soldering together your own keyboard then you can make use of their "kit assembly service", where you can get many kits assembled for a small service fee.

Add new comment