Adding dynamic and interactive elements to a web page can be a challenge, and there are a few techniques available in Drupal to allow for this.
One solution might be to add a form to the page, but this can cause problems with the cache system. Adding forms actually makes it slightly difficult to cache the page properly and you can easily see poor caching levels from pages containing forms.
Rather than adding a form to the site (and the complexities that come with that) it is possible to create a fully dynamic element that can be used to perform actions by the user. This is done using a combination of different techniques, all of which are built into Drupal and just need to be plugged together.
In this article I will look at using lazy builders to create a dynamic button that won't cause problems with the page cache, and will even work for anonymous users.
The Problem
For some context I thought I would talk about some of the work that went into putting this example together.
I was recently tasked to create a button on an Event content type that would act as the registration action for that event. The button needed to take into account different factors like the role of the user, the type of event, and the remaining capacity of the room. When the user clicked on the button they would be booked onto the event and the content of the button would change to inform them of this.
The button, therefore, needed to be fully dynamic for the user and the page they were visiting. In order to allow the button to be unique to each user and event I used a lazy builder to offset the generation of the button so that it wouldn't interfere with the caching of the page.
After writing down all the different permutations of the event registration button I realised we had around 27 different situations to manage. This meant that unit testing was a vital component of the generation of the button in order to capture all these different situations automatically. A single service class was created to deal with the generation of the button, which would then be used to generate the button wherever it was needed. Unit tests were written to load the button in different ways to prove that all situations worked correctly.
The final piece was to link this all together with a controller class. This would listen and respond to the action of the button being clicked and either sign the user up to the event, or unregister them from the event.
None of the code in this article is from that original work, but the ideas are the same. In fact, since using this technique on that project I have gone onto use it on another project with great effect.
Let's start by looking at lazy builders.
Lazy Builders In Drupal
The lazy builder API in Drupal allows the creation of highly dynamic content within a render array without having to disable the cache for the entire render array or the page the content is attached to.
They work just like a normal render array, but the rendering of their content is performed after the main rendering pass is done on the page. This offset also means that they get their own cache metadata and so this doesn't cause problems with the rest of the rendering pipeline. You essentially get two separate caches for the page.
This allows you to inject lazy built elements within your markup and allow Drupal to generate the dynamic content of those elements without causing cache problems for the entire page.
Lazy builders are easy to spot as they define a render array with a '#lazy_builder' element. Here is an example where we are rendering of this element will be performed in the lazyBuilder() method, which is kept in the same class.
$build['my_lazy_builder_element'] = [
  '#lazy_builder' => [
    static::class . '::lazyBuilder',
  ],
];
I have written about lazy builders in Drupal previously and how they can be used to generate dynamic content. There is a lot more to it than I have detailed here, so it's worth taking a look if you want to dive into them more.
The Block
The dynamic element is injected into the page using a block plugin. There are a few ways to add content into the page, but by adding a block we can attach the button to any page and use contexts to load data from those pages.
The module I'm creating here is called lazy_button, and I'll provide a link to the source code at the end of the article. Within this module is a block called "lazy_button_block", which has the following definition.
/**
 * Provides a block to display the lazy button.
 *
 * @Block(
 *   id = "lazy_button_block",
 *   admin_label = @Translation("Creates a block with a lazy builder button."),
 *   category = "custom",
 *   context_definitions = {
 *     "current_user" = @ContextDefinition("entity:user", required = TRUE, label = @Translation("User"))
 *   }
 * )
 */
As we want to personalise the element for each user who visits it we also inject the current user using a context_definition. I have written about Drupal plugin context definitions in a previous article if you are interested in knowing more about them as they are a very useful technique that .
The build() method of the block loads the current user from the context passed by the context definition and passes this as an argument to the lazy builder render element.
  public function build() {
    // Get the current user from the cache context.
    $currentUser = $this->getContextValue('current_user');

    $build = [];

    // Add the lazy builder for the button.
    $build['lazy_button'] = [
      '#lazy_builder' => [LazyButtonBlock::class . '::lazyButton', [
        $currentUser->id(),
      ],
      ],
      '#create_placeholder' => TRUE,
    ];

    return $build;
  }
The lazyButton() method itself accepts the user ID as a parameter. As this is a static method we don't have access to any services that the block might have, and so we need to load in all of the entities we require in this method.
As an example of something that changes and stays changed I decided to use the Drupal state API to save the current state of the button. The state here is a global state, in that if one user changes it then it changes for all users, but the principle is pretty much the same.
  /**
   * Lazy callback for the lazy button.
   *
   * @param int $userId
   *   The user ID.
   *
   * @return array
   *   The lazy button render array.
   */
  public static function lazyButton($userId) {
    // Load the user.
    $entityTypeManager = \Drupal::service('entity_type.manager');
    $user = $entityTypeManager->getStorage('user')->load($userId);

    // Get the current state of the button.
    $state = \Drupal::service('state');
    $buttonState = $state->get('lazy_button.state');

    // Generate button.
    return \Drupal::service('lazy_button.button_service')->generateButton($user, $buttonState);
  }
If you want to make this a state for the user then you would need to reference the state with the user ID added, like this.
$buttonState = $state->get('lazy_button.state:' . $user->id());
It might, however, be better to use the Drupal Private Tempory store to store data against the user instead of using the state service like this.
The final step is to load the lazy_button.button_service service and run the generateButton() method to generate the button using the user entity and the current state of the button. This will return a render array that will be placed into the content of the page by the lazy builder.
Let's look at the button service now.
The Button Service
In order to generate the button we need to create a service that will generate a render array with different properties depending on that incoming parameters.
services:
  lazy_button.button_service:
    class: Drupal\lazy_button\LazyButtonService
    arguments: [ '@string_translation' ]
The service definition just accepts the string_translation service so that we can properly translate the text being added to the button. This allows us to use the $this->t() method within this class.
All the service needs to do is generate and return a render array. In this example we are using a state to decide what text should be in the button. The user entity is also used to print out the name of the user as a greeting, which makes the element fully dynamic.
There is a little bit of code here, but I have added plenty of comments to the code example in order to make it clear what is being done.
  public function generateButton(UserInterface $user, $buttonState):array {
    // Set the text based on the content of the button state.
    if ($buttonState === 1) {
      $buttonText = $this->t('Button was clicked');
      $additionalText = $this->t('Button state is 1');
    }
    else {
      $buttonText = $this->t('Click the button');
      $additionalText = $this->t('Button state is 0');
    }

    // Initialize the output render array.
    $build = [];

    // Add a prefix and suffix to the button. The lazy-button-wrapper
    // class will be used to replace the button in the ajax callback. The
    // weight of these elements is set to -50 and +50 so that all other
    // elements will appear between them.
    $build['dynamic_lazy_button_prefix'] = [
      '#markup' => '<div class="lazy-button-wrapper">',
      '#weight' => -50,
    ];
    $build['dynamic_lazy_button_suffix'] = [
      '#markup' => '</div>',
      '#weight' => 50,
    ];

    // Add a user greeting to the beginning of the output.
    $build['user_greeting'] = [
      '#markup' => '<p>' . $this->t('Hi @username!', ['@username' => $user->getDisplayName()]) . '</p>',
    ];

    // Add the button itself. This must have the class of 'use-ajax' to
    // enable the ajax callback.
    $build['lazy_button'] = [
      '#type' => 'link',
      '#url' => Url::fromRoute('lazy_button_callback'),
      '#title' => $buttonText,
      '#attributes' => [
        'class' => [
          'use-ajax',
          'button',
        ],
      ],
    ];

    // Add the additional text element.
    $build['additional'] = [
      '#markup' => '<p>' . $additionalText . '</p>',
    ];

    // Setting the correct cache contexts is important to ensure that the
    // button is cached correctly.
    $build['#cache'] = [
      'contexts' => [
        'user',
        'route',
      ],
    ];

    // We need to ensure that the drupal.ajax library is included in the page.
    $build['#attached']['library'][] = 'core/drupal.ajax';

    return $build;
  }
The critical components here are the surrounding button wrapper elements, button itself, the cache for the button, and the attached core/drupal.ajax library. By adding the class "use-ajax" to the button element we are telling Drupal that when a user clicks on this link it should initiate an ajax call to the URL. In this case we are passing in the route "lazy_button_callback", which will be used to change the state of the button.
We also use an internal Drupal class called "button" that styles the link to look like a button.
Wrapping the entire render array in a class called lazy-button-wrapper allows us to use ajax to replace the contents of this render array with a response. We will come onto that when we look at the ajax callback.
Testing The Button Service
Also important in creating a button with a number of different states is testing those states. This ensures that the button reacts correctly to whatever state is given to it.
To set up the test we need to create a mocked user entity and a mocked LazyButtonService object. These two mocked objects can then be used for the tests we need to perform.
  public function setUp():void {
    parent::setUp();

    // Create a mocked user entity that will be used in the tests.
    $this->user = $this->getMockBuilder(User::class)
      ->disableOriginalConstructor()
      ->getMock();
    $this->user->expects($this->any())
      ->method('getDisplayName')
      ->willReturn('user');

    // Create a mocked string translation service.
    $translate = $this->getStringTranslationStub();

    // Create the mocked LazyButtonService object.
    $this->lazyButtonService = $this->getMockBuilder(LazyButtonService::class)
      ->setConstructorArgs([$translate])
      ->enableProxyingToOriginalMethods()
      ->getMock();
  }
To perform a test we just call the generateButton() method an pass in the needed parameters to perform the test. An example test is what happens when the user first sees the button, which would return a button with the text "Click the button".
  /**
   * Test the buttons initial state.
   */
  public function testButtonInitialState() {
    $buttonArray = $this->lazyButtonService->generateButton($this->user, 0);
    $this->assertEquals('<p>Hi user!</p>', $buttonArray['user_greeting']['#markup']);
    $this->assertEquals('Click the button', $buttonArray['lazy_button']['#title']);
    $this->assertEquals('<p>Button state is 0</p>', $buttonArray['additional']['#markup']);
  }
This test can be applied to all the different types of situation you may encounter. Depending on how you set up your button service you may even be able to use a data provider to lower the amount of code being written in your test class.
The Controller Ajax Callback
The final piece to this module is the ajax callback. When a user clicks on the button it will make an ajax call to a route within the site.
Here is the definition of the route, which would be held in a file called lazy_button.routing.yml.
lazy_button_callback:
  path: "/lazy_button/ajax"
  defaults:
    _controller: '\Drupal\lazy_button\Controller\LazyButtonController::lazyButtonCallback'
  requirements:
    _permission: "access content"
The controller action for this route loads the current user and changes the state of the button using the Drupal state service. The button is then regenerated using the generateButton() method before being attached as a command to the returned AjaxResponse object.
  /**
   * Callback for the route lazy_button_callback.
   *
   * @return \Drupal\Core\Ajax\AjaxResponse
   *   The response.
   *
   * @throws \Drupal\Component\Plugin\Exception\InvalidPluginDefinitionException
   * @throws \Drupal\Component\Plugin\Exception\PluginNotFoundException
   */
  public function lazyButtonCallback() {
    $response = new AjaxResponse();
    // Do not cache the response.
    $response->setMaxAge(-1);

    // Load the current user entity.
    $user = $this->entityTypeManager()
      ->getStorage('user')
      ->load($this->currentUser()->id());

    if (!($user instanceof UserInterface)) {
      return $response;
    }

    // Get the current button state.
    $buttonState = $this->state->get('lazy_button.state');

    // Change the button state depending on the value.
    if ($buttonState === 1) {
      $buttonState = 0;
    }
    else {
      $buttonState = 1;
    }
    $this->state->set('lazy_button.state', $buttonState);

    // Generate the button based on the user and the new state.
    $button = $this->lazyButtonService->generateButton($user, $buttonState);

    // Add the button to the ajax response as an insert command.
    $response->addCommand(new InsertCommand('.lazy-button-wrapper', $button));
    return $response;
  }
The use of InsertCommand in the code here means that we can tell Drupal that the contents of this payload (i.e. the new button) should entirely replace the contents of the element with this class. Essentially, we tell Drupal to run some simple JavaScript code without actually writing any JavaScript. This is where setting the wrapper class of lazy-button-wrapper comes into play as it allows us to replace the contents of this class with another version of it.
Conclusion
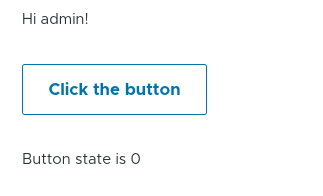
There are a few techniques going on here, but they work really well together to generate a dynamic element that can be placed anywhere on the site. When the block is placed into the page it looks like this.
When a user clicks on the button it will change state to look like this.
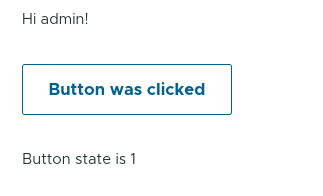
Clicking the button a third time puts it back to the original state. If you refresh the page then the current state of the button is retained.
In the project I mentioned above, the link was added to the event content type pages and it allowed users to sign up to events easily. I recently implemented this on another project and used a PHP enum to govern the different states that the button could have.
I have used a link to generate the interactive element here, but it is also possible to change this to an actual form button with a few modifications to the render array.
If you want to see the source code for this module (and see the button in action) then I have created a GitHub repository that contains the Drupal Lazy Button module. You just need to enable the module and add the block to a region on your site.
Feel free to use this on technique on your own projects, and please let me know if you have any questions.

Add new comment