The Marp suite of tools is great for creating presentations from simple Markdown rules.
I've previously written about how to get up and running with Marp, but as I have been using it for a while I have come up with a few things that might be useful to know about if you are getting to grips with it.
Here's a list of what I'll be talking about.
- Using HTML In Slides
- Adding Speaker Notes
- Using Spot Directives
- Using Images
- Generate A Presentation From A Document
- Jump To A Slide
- Creating Custom Themes
By default, markdown supports the use of HTML. The marp-cli tool that I use to generate slides will not allow HTML to be added by default. This means that any HTML code you add will be encoded.
The reason this is done is to prevent security problems. As it is possible to host a presentation online using the Marp framework, the ability to inject arbitrary script tags into the presentation poses a security risk.
If you are generating local presentations that you distribute yourself then your should be safe to include HTML elements. As long as you know of the ramifications of doing so.
In certain circumstances it is actually quite useful to add HTML to elements as it allows for fine control over elements on the page. For example, let's say that you wanted to create a block of text that had different styling, this could be a different colour of smaller text. This would be added to the slide as a block of HTML like this.
---

## Slide header

- Bullet point one.
- Bullet point two.

<p class="small-text">Some smaller text at the footer of the page.</p>

---
You would then add some custom styles to the front matter to, for example, change the elements with that class to be smaller.
---
theme: uncover
size: 16:9
style: |
  .small-text {
    font-size: 0.75rem;
  }
marp: true

---
However, without the enable HTML setting, the slide would be created with encoded HTML in place. In order to add HTML elements to your slides you need to do a couple of things.
If you are using the VS Code preview tool then you need to change the Enable HTML setting within the plugins settings.

When generating your presentation you need to pass in the --html flag in order to apply that change to the presentation itself.
npx marp --html --output=dist --input-dir=src
You can also add this to your Marp configuration using the "html" .
  "marp": {
    "allowLocalFiles": true,
    "inputDir": "src",
    "output": "dist",
    "html": true
  }
With these settings in place your presentation can now contain HTML elements.
Speaker notes are very useful. I will often put some extra bullet points in the notes section of slides as an aid to memory, but having references and other explanations in the notes can often be beneficial to people reviewing the presentation later.
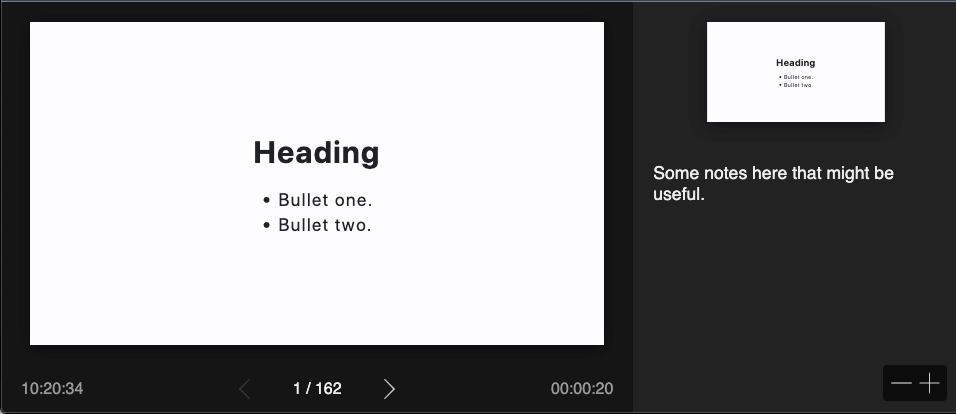
Adding speaker notes is quite simple, just create a HTML comment block in your slide and add your notes.
---

## Heading
- Bullet one.
- Bullet two.

<!--
Some notes here that might be useful.
-->

---
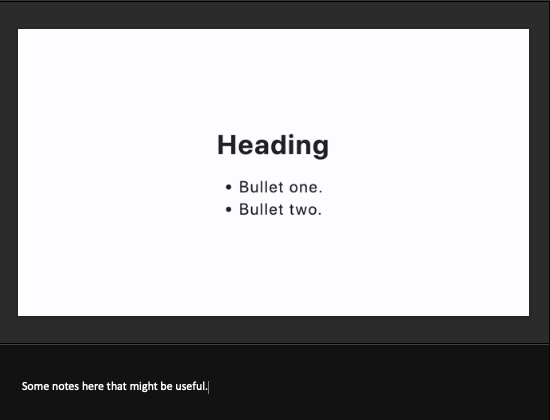
When you come to generate your presentation you can then display the speaker notes if you are using HTML or Powerpoint.
In HTML mode, you need to click the icon that opens the speaker notes dialog, but you'll see something like this.
In Powerpoint (or Keynote) the notes will appear in their usual place.
Something to be aware of it that the speaker notes don't show if you are using the PDF format of the presentation. They can, however, be made to appear as notes on the PDF document.
You can do this by adding the "--pdf-notes" flag to your marp-cli tool.
npx marp --pdf --output=dist --input-dir=src --pdf-notes
This will add your notes to the PDF document in the form of notes that are attached to the relevant slide.
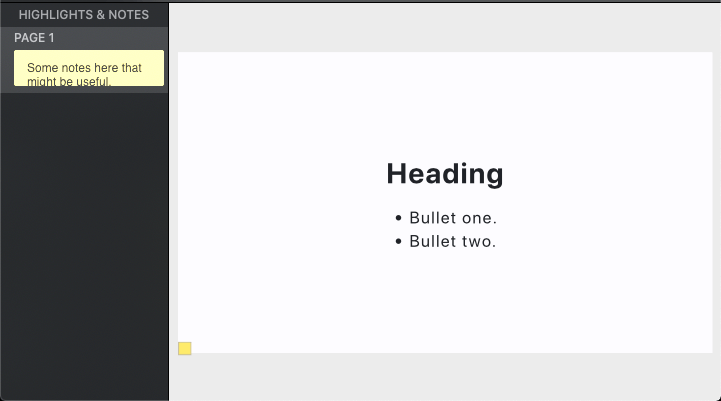
This does add little note icons to any of your slides that contain notes, which might get in the way if you are giving a presentation using the PDF format.
Directives added to the front-matter (at the head of the document) are global directives that apply to the entire document.
It is possible to set directives within your presentation to set a global directive from that point on in your presentation. This is a good way of creating a presentation with a completely blank front slide, but with a footer on every item after this.
The following markdown will create a presentation with a simple front slide and a footer on every slide after that.
---
theme: uncover
marp: true

---
# My Presentation
By Me

---
<!--
footer: "My Presentation"
 -->
## Heading
- Bullet one.
- Bullet two.
---
It is also possible to create spot directives that only apply to the current slide by prefixing the directive flag with an underscore.
The following example will remove the footer from this slide only. This is useful if you have a bunch of content on the slide and want to remove the footer to prevent it from getting in the way.
---
<!-- _footer: "" -->
A slide with a bunch of content
---
Anything that you set as a normal front-directive in the header can be set as a spot directive within your presentation.
Marp has good image support, but sometimes they can be a little difficult to get working correctly. The Marpit documentation on adding images has lots of examples on how to add images in a variety of different formats and styles.
I follow a practice of adding images relative to the src directory but reference the image in a way that works from the src and dest directories. Essentially, to add an image to your presentation you could add it using the image syntax like this.
---

---
You will quickly see that although this does add the image it will not take any notice of the size of the image compared to the size of the slide.
To set the size of the image you need to apply some directives to the image format. The "bg" flag sets the image to be a background image, which changes how the image interacts with the slides. By setting a fixed width of 500px (using "w:500") and putting the image on the right (by using "right:50%") it allows the image to become part of the slide content.
---
## Heading
- Item one
- Item two
- Item three

---
This slide generates the following layout.

To put the image on the left hand side just swap the right to a left.

To set an image to be front and center of a single slide we just need to use the "bg" style and set the width to 50%. The image will auto center on the slide so we don't need to do anything else.
---

---
This generates the following slide.

There's a lot more about how images can be used in Marpit. I suggest you create a few code snippets that work for what you need and add them in as and when you need to.
If you have a markdown document then there is a good chance that you can get most of the way towards a presentation by using the headingDivider directive. This takes an array of headings to split the document by, with numbers 1-6 being viable options.
I have found that if you set an array of all of the headings types then the presentation generated will be mostly complete presentation, separated by the headings in the document.
---
theme: uncover
size: 16:9
headingDivider:
  - 1
  - 2
  - 3
  - 4
  - 6
marp: true
I have tried this on a few markdown documents and even without adding the Marp slide separator (aka "---") the presentation generated is mostly ok. After a few minutes of adding separators to separate long sections into different slides the resulting presentation looks great.
A good tip (especially if you have a long presentation file) is to create a link that you can use to jump to a certain slide number. This can be done by creating a markdown link that points to a certain slide number as specified by a flag.
The following slide create links to slide 10 and slide 20 in the content of the slide.
---
## Slide Title
- [Jump to slide 10](#10)
- [Jump to slide 20](#20)
---
This technique is useful if you want to skip a section. Rather than just jump through the slides you can click the link and jump to the start of the next section.
The good thing about this format is that it works in the VS Code preview tool, which means you can test your presentation links before exporting.
Marp comes with the ability to add in your own themes, meaning that you can completely customise your slides and create a custom branded theme deck. As it turns out getting this working is quite simple.
The main thing to realise when creating your styles is that the structure of the markup that Marp produces is like this.
<section>
  <h1>First page</h1>
</section>
<section>
  <h2>Second page</h2>
  <ul>
    <li>Bullet one.</li>
  </ul>
</section>
Code styles, footers and anything else that you add to your slides will be included within the section elements in your slides markup.
To add in a custom theme you need to create a file that will store your styles. I have experimented with where this file can live, but I've found that it's best to add it so that it lives next to your main slides.md file (the markdown of your slides).
You need to add the theme name to the top of your file by adding the @theme directive and the name of the theme.
/*
@theme hashbangtheme
*/

section {
  width: 1280px;
  height: 960px;
  font-size: 40px;
  padding: 10px;
  background: rgb(121, 121, 121);
}

h1 {
  font-size: 60px;
  color: #09c;
}

h2 {
  font-size: 50px;
  color: #fff;
}

code {
  font-size: 30px;
}
You can then reference the theme from your Marp presentation file via the theme front-matter directive.
---
theme: hashbangtheme
marp: true

---
If you want to preview your theme in VS Code then you'll need to add in another file. Create a file called settings.json in a directory called .vscode in the root directory of your project and add in the path to your styles file.
{
  "markdown.marp.themes": [
    "./src/styles.css"
  ]
}
Now, when you save your styles file VS Code will automatically pick that up and regenerate your presentation.
The issue with this approach is that it leaves a lot of standard styles out, which means that you need to write in a lot of boiler plate code to get things like syntax highlighting or image placement working correctly. The solution to this is to import one of the default styles and start making your changes.
You can do this by adding an @import directive to the top of your CSS file and then start making changes. The three default themes that come with Marp are default, uncover, and gaia.
/*
@theme hashbangtheme
*/

@import 'uncover';

h1 {
  font-size: 60px;
  color: #09c;
}
This is useful if you want to completely reskin a presentation without having to essentially start from scratch.
If there anything you have found about Marp that your find useful? Add them to the comments below or get in touch and let us know. If we get enough responses we'll create another post like this.

Add new comment