Articles

JS Bin

JS Bin is an online tool that allows you to test JavaScript without having to muck about with files. You can just quickly cut and paste some code in and view the output. It is even possible to make the code you are looking at public and then use this as part of an ajax call in another instance of the application.

To get you started there is a nice help section, which also includes a couple of videos.

JS Bin

This tool really impressed me, especially the easy inclusion of several different JavaScript frameworks. I don't mind testing JavaScript, but sometimes I just want to run a little bit of code on it's own to see why it isn't working as I expected it would. This tool fills that much needed gap, and the addition of allowing other people to view your code is a very nice feature. Well worth a look!

JavaScript Redirects

There are two main ways in which to redirect the browser using JavaScript, both of which look at the location of the window object. These are the location.href property and location.replace function.

location.href

The following example will cause the page to redirect to another page, keeping the browser history. This might seem like a minor point, but if you redirect a user to another page they will be able to click back, which will mean that they are redirected again.

Search A Table With JavaScript

Using server side scripts to search for things can be as complex or as simple as the situation requires. However, if you have a table of results and you just want to enable a simple JavaScript search on that table then this might be the script for you.

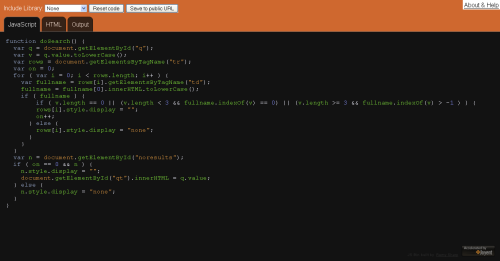
To search a table using JavaScript you need to split the table into bits, this can be done using the getElementsByTagName() function, which takes the name of the element that you want to capture. So to grab all of the rows of a table as an array you need to pass the value of tr.

var rows = document.getElementsByTagName("tr");

We can then iterate through these rows, grabbing the column that you want to search on, with the following code.

MySQL Procedure To Get Incremental Numbers

Run the following table definition to create a table called tests in the test database.

DROP TABLE IF EXISTS test.tests;
CREATE TABLE test.tests (
 id int(10) unsigned NOT NULL auto_increment,
 var varchar(45) NOT NULL,
 PRIMARY KEY  (id)
);

Fill it with some default values:

INSERT INTO tests(var) VALUES('one'), ('two'), ('three'), ('four');

Now lets say that you want to find the values in the table, but that you want to increment a value for each row, the following procedure will do this. If you are using the MySQL Query browser then open a script table and past the following and execute, changing any database/table definitions.

DVD Backup With Linux

If you are part of a company the chances are that you have either set up or are aware of a backup policy for your data. However, even if you are not then you might have the need to backup certain items to a DVD drive.

DVD burning is accomplished in Linux by using the mkisofs and growisofs programs. This can be run in either a two stage or a single stage process. The mkisofs program is used to create an iso file that is then written to the DVD using the growisofs program. The following will take three files and create an iso called toburn.iso, this will then be used to write the data to the DVD.

PHP Array Of UK Counties

Use the following code to create an array of counties in the UK.

Optimize Your MySQL Database Tables

You can optimize MySQL tables using the OPTIMIZE command. This can be used if you have a table with any variable length rows and you make lots of changes to the data in that table. Variable length columns are VARCHAR, VARBINARY, BLOB, or TEXT. The OPTIMIZE TABLE will defragment the data and reclaim any unused space. This also has the effect of resetting any auto incrementing numbers to the highest value in the table.

OPTIMIZE TABLE tbl_name;

You can do this for every table in the database, but to save time MySQL comes with a command line script that will optimize all tables in a database. This program is called mysqlcheck and can be run like this.

mysqlcheck -o database -u user -ppassword

Note that when writing this command you should not put a space in between the -p and your password.

Sequentially Rename All Image Files In A Directory With PHP

The following function will rename all of the image files in a directory to be sequential. The parameters are the path of the directory that the files are in and the name of a function that will be used to sort the array of files through the PHP usort() function.

function sequentialImages($path, $sort=false) {
 $i = 1;
 $files = glob($path."/{*.gif,*.jpg,*.jpeg,*.png}",GLOB_BRACE|GLOB_NOSORT);
 
 if ( $sort !== false ) {
  usort($files, $sort);
 }
 
 $count = count($files);
 foreach ( $files as $file ) {
  $newname = str_pad($i, strlen($count)+1, '0', STR_PAD_LEFT);
  $ext = substr(strrchr($file, '.'), 1);
  $newname = $path.'/'.$newname.'.'.$ext;
  if ( $file != $newname ) {
   rename($file, $newname);  
  }
  $i++;
 }
}

The following function can be used in the second parameter to sort the files by their last modified time.

Convert A Date Into Timestamp In JavaScript

I have previously talked about using PHP to convert from a date to a time, but what about doing the same in JavaScript?

To get the unix timestamp using JavaScript you need to use the getTime() function of the build in Date object. As this returns the number of milliseconds then we must divide the number by 1000 and round it in order to get the timestamp in seconds.

Math.round(new Date().getTime()/1000);

To convert a date into a timestamp we need to use the UTC() function of the Date object. This function takes 3 required parameters and 4 optional parameters. The 3 required parameters are the year, month and day, in that order. The optional 4 parameters are the hours, minutes, seconds and milliseconds of the time, in that order.

Displaying Wordpress Authors

Wordpress has a couple of rarely used functions that allow author information to be displayed for the current post and a list of all of the authors on the blog.

Adding a written by message to your posts is not difficult at all. Just use the the_author_posts_link() function inside the post loop.

<?php the_author_posts_link(); ?>

This function shouldn't be confused with the the_author_link() function that prints out the link in the author's profile.

The second way of printing out author information is by using the wp_list_authors() function. This can take a number of arguments, but the simplest use of it is as follows: