There are lots of ways to draw objects using the Tkinter Canvas element, but making the canvas elements interactable adds a lot to the applications you create. There are a few things to take into account when binding events like what events to trigger on and how to find out what item triggered what event.
In this article I will address how to set events, how to react to their output and how to find out what element triggered the event.
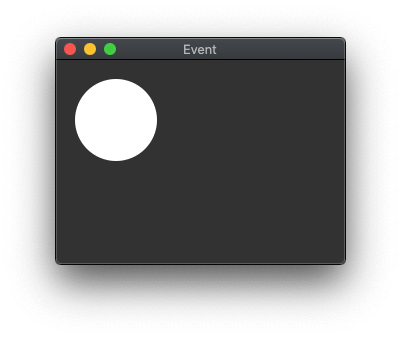
Let's start by creating a very simple application that contains a Canvas element. In that Canvas we create an oval element that we can use for the rest of the examples.
import tkinter as tk
from tkinter import Canvas

class CanvasEvents(tk.Tk):
    def __init__(self):
        super().__init__()

        self.title("Event")

        self.canvas = Canvas(self)
        self.canvas.pack(expand=1,fill=tk.BOTH)

        oval_element = self.canvas.create_oval(20, 20, 100, 100, width=2, fill="white")

        self.canvas.pack()

if __name__ == "__main__":
    piechart = CanvasEvents()
    piechart.mainloop()
This creates an application that has an oval.
There is no events here to trigger yet, so let's add some.
Binding Events
To create an event in a Canvas we need to use a bind function that binds an event to an object. The bind function takes an event and a function that should be called when the event is triggered. Events take the form of the following.
<MODIFIER-MODIFIER-TYPE-DETAIL>
MODIFIER is one of the following.
Control
Mod2
M2
Shift
Mod3
M3
Lock
Mod4
M4
Button1
B1
Mod5
M5 Button2
B2
Meta
M
Button3
B3
Alt
Button4
B4
Double
Button5
B5 Triple
Mod1
M1
TYPE is one of the following.
Activate
Enter
Map
ButtonPress
Button
Expose
Motion
ButtonRelease
FocusIn
MouseWheel
Circulate
FocusOut
Property
Colormap
Gravity Reparent
Configure
KeyPress
Key
Unmap
Deactivate
KeyRelease Visibility
Destroy
Leave
And detail is the key symbol for KeyPress and KeyRelease.
Here are a few examples of potential events we can listen to.
- <Button-1> - The primary mouse button being clicked.
- <Enter> - The mouse cursor enters the element.
- <Leave> - The mouse cursor leaves the element.
- <Control-Button-1> - The primary mouse button being clicked in combination with the control key being held down.
- <KeyPress-a> - The 'a' key is pressed.
- <a> - The 'a' key pressed. In this case the KeyPress event can be omitted.
- <KeyPress-Alt_L> - The left "Alt" key is pressed.
- <Control-v> - The control and "v" keys are pressed at the same time.
- <Control-V> - The control, shift and "V" keys are pressed at the same time. Note the capitalisation of the "V".
To bind the mouse button being clicked to the canvas element we would use the bind() method like this.
self.canvas.bind('<Button-1>', self.canvas_click_event)
The self.canvas_click_event method is a method within the same CanvasEvents object defined at the top. All we do in this method is to print out that a click event happened, what the coordinates of that event were, and the Tkinter widget that triggered the event.
    def canvas_click_event(self, event):
        print('Clicked canvas: ', event.x, event.y, event.widget)
Here is an example of the output we see if the canvas element is clicked.
Clicked canvas: 208 121 .!canvas
We can also create the event using the bind_all() method. This will attach the event to the application level, rather than at the element level, meaning that this event will trigger even if the element we used doesn't have focus.
self.canvas.bind_all('<a>', self.canvas_a_key_pressed)
This type of event is especially useful for keyboard shortcuts in your application.
Binding Events To Canvas Elements
To create an event against an element inside the canvas we need to use the tag_bind() method. This method also takes the ID or tag of the element we want to bind the event to. The most common way to find this ID is by capturing the result of the Canvas element creation method.
In the code below we are using the tag_bind() method to tag the primary button click event "Button-1" to the callback of object_click_event method on the white oval.
self.canvas.tag_bind(oval_element, '<Button-1>', self.object_click_event)
The event object sent to the event contains information about where the event happened on the canvas, but also what object triggered the event stored in the "num" property. This gives us a handy way of grabbing the element that was clicked and changing it's colour to blue.
    def object_click_event(self, event):
        self.canvas.itemconfigure(event.num, fill="blue")
        print('Clicked object at: ', self.canvas.coords(event.num), event.num)
The canvas object also has a method built in called find_closest() that can be used to find the closest object to the item that was part of the event. We can also use this method to find the correct item and change that items colour to blue.
    def object_click_event(self, event):
        item = self.canvas.find_closest(event.x, event.y)
        self.canvas.itemconfigure(item, fill="blue")
        print('Clicked object at: ', event.x, event.y)
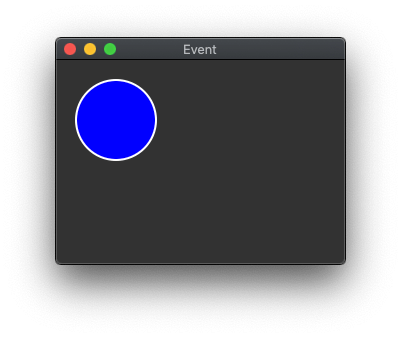
In both of these examples we change the oval to look like this when it is clicked.
You will notice when running this code that when we click the command line output will be as follows.
Clicked object at:  [20.0, 20.0, 100.0, 100.0] 1
Clicked canvas:  78 62 .!canvas
This means that Tkinter has registered a click event for the canvas object and the element will be triggered. This is because button clicks are considered a global event and Tkinter is triggering the event for any object that is listening to the event. The documentation refers to the fact that you can return the word "break" to prevent event propagation. Whilst this is true, the difficulty here is that these are two separate events and so using "break" will do nothing. The "break" keyword is only useful if you have two events that trigger at the same time on the same object. For example, this might be mouse move and mouse enter as they would both trigger on the same event.
One way to prevent the canvas click event triggering is to keep track of the click event within the object you bind to the event. In the following code we set a something_clicked property to 1 when the oval is clicked, which the canvas click event will look for and will skip if the property is set. The canvas click event will set the property back to 0 afterwards so the state of the click event is back to normal.
class CanvasEvents(tk.Tk):
    def __init__(self):
        super().__init__()

        self.title("Event")

        self.something_clicked = 0

        self.canvas = Canvas(self)
        self.canvas.pack(expand=1,fill=tk.BOTH)

        oval_element = self.canvas.create_oval(20, 20, 100, 100, width=2, fill="white")

        self.canvas.bind('<Button-1>', self.canvas_click_event)
        self.canvas.tag_bind(oval_element, '<Button-1>', self.object_click_event)

    def canvas_click_event(self, event):
        if self.something_clicked == 0:
            print('Clicked canvas: ', event.x, event.y, event.widget)
        self.something_clicked = 0

    def object_click_event(self, event):
        self.something_clicked = 1
        self.canvas.itemconfigure(event.num, fill="blue")
        print('Clicked object at: ', self.canvas.coords(event.num), event.num)
Now, when we click the oval, only the oval will respond to the button click.
Not all triggered events will contain the "num" property. For example, when we want to trigger mouse enter or leave events we need to use the find_closest() method as we have no way to find the actual element ID.
In the code below we are setting the enter and leave events for the oval element. For the enter event we call the object_enter_event method and set the configuration of the element to have a fill colour of yellow. Conversely, the object_leave_event method sets the fill colour back to white.
        self.canvas.tag_bind(oval_element, '<Enter>', self.object_enter_event)
        self.canvas.tag_bind(oval_element, '<Leave>', self.object_leave_event)

    def object_enter_event(self, event):
        item = event.widget.find_closest(event.x, event.y)
        self.canvas.itemconfigure(item, fill="yellow")
        print('Enter event:', event.x, event.y)

    def object_leave_event(self, event):
        item = event.widget.find_closest(event.x, event.y)
        self.canvas.itemconfigure(item, fill="white")
        print('Leave event:', event.x, event.y)
Note that using the method name canvas.itemconfig will also work as this is a pseudonym.
Now, if we move the mouse pointer over the white oval we created at the start it will change to yellow.

When we move the mouse pointer away again the oval will return to being white again.
Creating events for canvas object is fairly straight forward. The difficulty comes from correctly responding to the event and finding the correct element that triggered the event.


Layco