Yesterday I talked about using the Flex Script element to run code within the mxml file, you can also use the source attribute of the Script element to reference external files. To create an external script file FlashDevelop go to the File->New and select Blank Document. You can also do this by pressing Ctrl+N. This will create a blank document that you must save into your src folder of your project with the extension as. Note that if you call this file "sourcefile.as" then you must reference this in your script tag like this.
<mx:script source="sourcefile.as">

</mx:script>
When you do this you will notice that the script file will be part of the Main.mxml file. You can add functions in the same way as you would with an inline script tag.
Printing
With this external script file we will now create some images and print them using the built in printing object that Flex has. This object is called FlexPrintJob and you must include this at the top of your script file if you want to use it. Put the following line at the top of your script file.
import mx.printing.FlexPrintJob;
Create a button in your mxml file that will be used to print.
<mx:button click="printImage();" id="print" label="Print"></mx:button>
Add in an image that will be printed.
<mx:image id="one" source="one.png"></mx:image>
Here is the image that will be used.

Go back into the script file and add the function that will print the image out. We called this function printImage() in our Button declaration. This function works by creating a new FlexPrintJob object called printJob. This function start() is then used to try and print. Basically, this function returns true if the print job worked, and false if the user clicked cancel.
If the start() function returns true then the object to be printed (in this case the image with the id of "one" is added to the printJob object. Finally, the send() function is called which sends the data off to the printer. Here is the function.
public function printImage():void
{
 // Create a FlexPrintJob instance.
 var printJob:FlexPrintJob = new FlexPrintJob();

 // Start the print job and check that it worked
 if (printJob.start() != true) {
  return;
 }

 // add object to be printed to the print job
 printJob.addObject(one);

 // send to printer
 printJob.send();
}
This is the simplest use of the FlexPrintJob function as there are controls that can be used to format the pages.
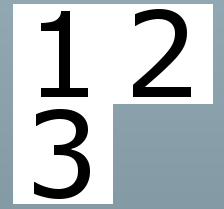
It is possible to print off multiple objects, especially if they are children to another object, by adding the parent object to the FlexPrintJob object. Take the following section of mxml, which defines a Canvas element, with three positioned images as children.
<mx:canvas id="images">
 <mx:image id="one" source="one.png" x="0" y="0">
 <mx:image id="two" source="two.png" x="100" y="0">
 <mx:image id="three" source="three.png" x="0" y="100">
</mx:image></mx:image></mx:image></mx:canvas>
This produces the following application.

To print out all three images at once just include the Canvas object instead of the single image object. Change line 11 in the printImage() function from this:
printJob.addObject(one);
To this.
printJob.addObject(images);
The printJob object knows about inheritance and will print out everything contained within that element. This includes buttons or any other element that you put into the canvas element.
See the Flex documentation for more information about the FlexPrintJob object.


Add new comment