Security Assertion Markup Language (SAML) is a standard that passes authentication credentials between hosts and essentially allows for a single sign on solution to be created. The standard uses XML files that get passed between the authentication system (known as the identity provider or IdP) and the service users want to sign into (known as the service provider or SP).
SimpleSAMLphp is an open source application that implements SAML mechanisms and allows for the authentication system to be created as well as some administration tasks to be performed. The system is robust and battle tested, having been integral to the open source authentication systems for a number of years.
In this article I will walk you through installing SimpleSAMLphp and configuring it to get it up and running. Once finished you should have a basic install of SimpleSAMLphp as a stand alone application. You can also install this as a dependency of an application as long as you point the webroot to the correct place.
Installing SimpleSAMLphp
The install instructions for SimpleSAMLphp are pretty archaic, but I think that's a symptom of the system being around for many years and the best practice of installing the system are now different. They combine composer based workflows with the old school method of downloading the source code and extracting it into a directory.
The best approach I have found is to use composer to manage SimpleSAMLphp. This means the software to be updated without having to copy files around and allows your configuration files to be stored separately from SimpleSAMLphp.
If you are starting out from scratch then you will need to run composer init to get composer up and running for your project.
composer init -n --name hashbangcode/mysimplesamlphp
You can install the system with the following require command.
composer require simplesamlphp/simplesamlphp
Once you have the system installed you need to set up your web server to point the web root at the vendor/simplesamlphp/simplesamlphp/www directory. I know that pointing your web root inside the composer directory doesn't seem normal, but this approach is the best in getting the most out of the system. An alternative is to create a symbolic link from your project root to the same directory.
The most important thing to add is an environment variable that will re-point the config directory. This allows you to install SimpleSAMLphp in the vendor directory using composer, but configure and customise it as much as you need to from an external configuration source.
Here are the configuration items for different web servers. Note that the directory at /var/www/sso/simplesamlphp/dev/config is not created any composer or anything so you'll need to create this yourself.
Apache
SetEnv SIMPLESAMLPHP_CONFIG_DIR /var/www/sso/simplesamlphp/dev/config
Nginx
fastcgi_param SIMPLESAMLPHP_CONFIG_DIR /var/www/sso/simplesamlphp/dev/config;
Next we need to create the configuration directory named in the environment variables. I have found that the most sensible thing to do is to add the configuration for SimpleSAMLphp to the same directory as your SimpleSAMLphp install and wrap them up as a Git repository. This should live next door to the vendor directory as a directory called simplesamlphp.
You will need to create a directory for the configuration, the metadata and certificates.
A good practice approach is to have different configurations for different platforms (which helps with testing). You can split the configuration like this and create your directory structure so that it looks like this.
simplesamlphp/
- dev/
- - certs/
- - config/
- - metadata/
- prod/
- - certs/
- - config/
- - metadata/
vendor/
composer.json
composer.lock
With the directories in place you then must copy the contents of vendor/simplesamlphp/simplesamlphp/config-templates into the config directory and the contents of vendor/simplesamlphp/simplesamlphp/metadata-templates into the metadata directory. This can be done using the following commands.
cp -r ./vendor/simplesamlphp/simplesamlphp/config-templates/. simplesamlphp/dev/config
cp -r ./vendor/simplesamlphp/simplesamlphp/metadata-templates/. simplesamlphp/dev/metadata
With the configuration files in place we can now move onto configuring the system.
SimpleSAMLphp Configuration
It is now time to edit the config.php file at simplesamlphp/dev/config to let SimpleSAMLphp know about how we want to configure the system.
Depending on where you want the system to be hosted depends on the baseurlpath setting. If this is a stand alone application then set this to '/'. If the system is installed in a sub-directory then this this accordingly. SimpleSAMLphp will redirect to this path when authenticating so you need to be sure that it is correct for your setup.
'baseurlpath' => '/',
An administration password exists to allow you to log into the system to test authentications and grab metadata. This password can be set using the auth.adminpassword option. Set this to something different to prevent the system from complaining and to ensure you have a secure system.
'auth.adminpassword' => 'somecomplexpassword',
There is a secret salt setting that needs to be added. The system uses this to work out some of the internal hash values and so it's important for it to be created. Run the following command to produce a secret salt value.
tr -c -d '0123456789abcdefghijklmnopqrstuvwxyz' </dev/urandom | dd bs=32 count=1 2>/dev/null;echo
Paste the output into the secretsalt config option. It should look something like this.
'secretsalt' => 'yaymigq8bmsmda2l97r50qfytyuhvop4',
Note: Don't change this once you have started configuring your authentication services as it will cause all of your keys to change and ultimately cause problems for your users as they won't be able to authenticate.
Set the timezone to where the server is installed.
'timezone' => 'Europe/London',
We need to inform SimpleSAMLphp about the location of a couple of directories. The first is the certificates directory, which is set with the use of the certdir option. By default this points to a directory relative to the SimpleSAMLphp application directory. In which case, in order to point it our custom directory we need to either add it as an absolute path.
'certdir' => '/var/www/sso/simplesamlphp/dev/certs/',
Or do some jumping around, the application will figure out where the directory is based on this. I have found this is easier to manage as it will then work on any setup that it is installed on.
'certdir' => '../../../simplesamlphp/dev/certs/',
Next, we need to change the reference to the metadata sources directory by changing the location of the directory setting in the metadata sources section. This is similar to the certdir option in that you can either set it to be absolute or relative to the SimpleSAMLphp application directory. Here is the setting with a relative path.
'metadata.sources' => [
  [
    'type' => 'flatfile',
    'directory' => '../../../simplesamlphp/dev/metadata/',
  ],
],
After this you should be able to visit your host and see the SimpleSAMLphp welcome page. You can log into this using the administration password you set above.
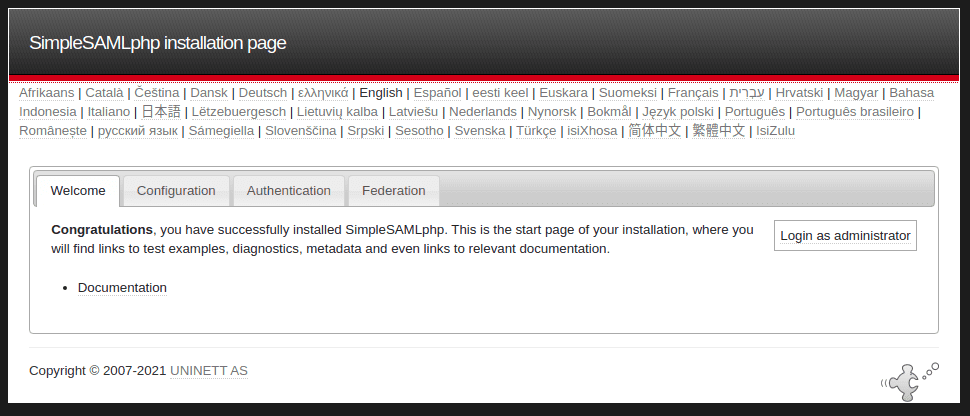
The system doesn't do a lot at the moment, so let's enable some authentication protocols and modules.
By default, SimpleSAMLphp uses SAML 2.0, and although there is support for Shibboleth authentication, that is currently deprecated so you shouldn't rely on it. Enable the SAML 2.0 protocol by setting true to the option enable.saml20-idp.
'enable.saml20-idp' => true,
With that set you can see SAML enabled as a protocol in the administration area.
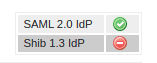
Don't worry about enabling the 'shib13-idp' setting as this refers to the Shibboleth protocol that has been deprecated and will be removed in SimpleSAMLphp 2.0.
Finally, you can now enable a few modules, this is done by enabling them in the module.enable setting in the config.php file.
'module.enable' => [
  'core' => true,
  'saml' => true,
],
Modules are used to do things like create themes for your authentication systems or provide extra methods of authentication. The old school approach to enabling modules was to create a file in the module directory called 'enable'. However, with this composer based setup this isn't the case and we instead manage modules via this mechanism.
That's it, you can now start setting up your themes and configuring your authentication providers.


Bob